
Salt crystal growth guide
Salt crystals under a microscope: dissolve and regrow them
A few grains of table salt can become a small crystal-growth experiment. Record how their outlines change in water, then inspect the solid left after evaporation.
Follow one material through a visible change
Use known table salt to make a record with three stages: dry grains, grains in water, and solid after evaporation. Your goal is to describe the changes, rather than grow one perfect cube.
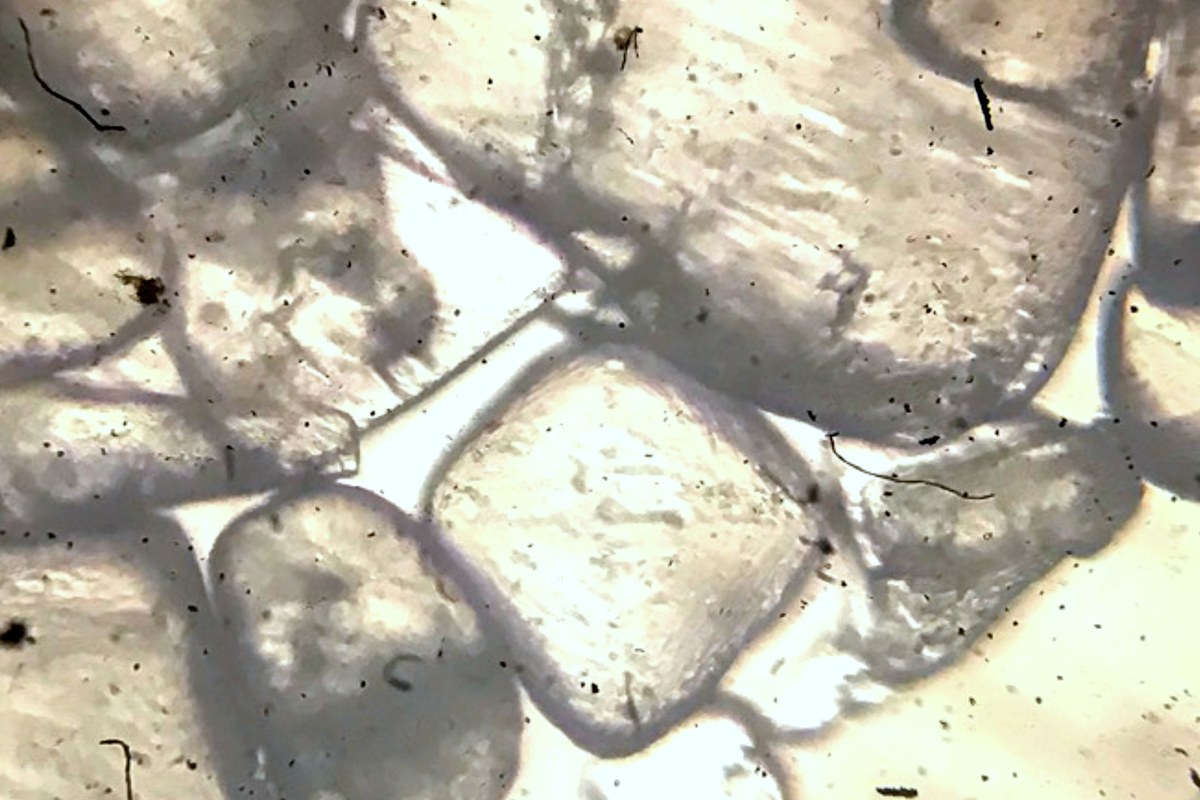
Table salt is mainly sodium chloride. Its crystals can have flat faces and square outlines. Broken grains and crowded growth can look less regular. The photo above shows undissolved crystals in a salt solution. It does not show a timed growth sequence from this activity.
This experiment studies dissolving and crystal formation. Individual dissolved ions are too small to see with an ordinary classroom light microscope. A clear drop can still contain dissolved salt.
Gather supplies and choose low power
You will need:
- A microscope with a low-power objective and suitable light.
- Two clean slides, a dropper, and a small tray.
- A labeled package of plain table salt.
- Water at room temperature, preferably distilled.
- A clean spoon, notebook, pencil, and timer.
Use the same water for both slides. One slide will contain salt and water. The other will contain only water. This second slide is a control. It helps you check for residue from the water, glass, or handling.
Keep the salt package outside the work area after taking a small sample. Do not taste any slide material or return it to the package. Children need adult supervision with glass. This version uses room-temperature evaporation and needs no flame, heater, or hot water.
1. Record the dry grains
Label the slides "salt" and "water control" near one end. Keep the labels outside the viewing area. Place two or three small salt grains near the center of the salt slide.
Start at the lowest available magnification. A 4X objective with a 10X eyepiece gives 40X total magnification. Whole grains may be too thick or large for higher power. The magnification guide explains how the two lens powers combine.
Inspect clearance from the side before looking through the eyepiece. Focus according to the equipment instructions. Do not let an objective touch a grain or the slide.
Draw one grain and record its visible edges. Use reflected light if your microscope provides it and transmitted light gives a poor view. Keep a note of the lighting method so you can use it again later.
2. Add water and watch the outlines
Remove the salt slide from the stage. Place it flat in the tray. Add two small drops of water over the grains. Put two similar drops of the same water on the control slide.
Keep both slides uncovered for this low-power activity. Use only a small amount of liquid. Dry the underside before returning a slide to the stage. The drop must stay clear of the stage edges and objective.
Record the starting time. Watch the salt grains at low power and draw their outlines again. Look for edges that become smaller or less sharp as the grains dissolve. Some grains may remain if the water cannot dissolve all the salt present.
Do not confuse a grain moving out of view with a grain dissolving. Scan the drop again if you lose it. If you need to mix the sample, remove the slide first. Keep tools and loose liquid away from the microscope.
The Institute of Physics describes this direct observation of salt dissolving on a slide. Researchers at Pacific Northwest National Laboratory also recorded sodium chloride changes with a microscope at 100X.
3. Let the water evaporate at room temperature
Put both slides in the tray on a stable surface. Choose a place away from dust, pets, and food. Leave the drops exposed to the room air.
Do not add a coverslip, because it would slow the water loss. Do not speed the process with a hair dryer or by heating the slide. Record the location and check the drops during the day. Small drops can take hours to dry, and the time will vary with the room conditions.
Evaporation removes water from the solution. As less water remains, the dissolved salt becomes more concentrated. Crystals can form when the solution can no longer keep that amount of salt dissolved.
Use this table for a short record. The intervals are observation choices, rather than a prediction of when crystals will form.
| Check | Salt slide | Water control |
|---|---|---|
| Start | Draw the grains and drop | Describe the clear drop |
| After five minutes | Note remaining grains | Note any visible particles |
| Later checks | Record time and new outlines | Record time and residue |
| After drying | Draw several crystal shapes | Describe any dry marks |
4. Compare the dry slides
When the drops are dry, view each slide at the same low power. Scan the center and former edge of each drop. Look for separate angular shapes as well as dense patches.
The salt slide may show small square outlines, joined crystals, or an uneven white crust. Flat square outlines fit the cubic structure of sodium chloride. They do not prove the identity of an unknown material.
Compare the water control before assigning every mark to the added salt. Tap water can leave mineral residue. Dust and old slide marks can also affect either preparation. A dirty control is a reason to repeat the activity with clean glass and fresh water.
If some original grains never dissolved, record that fact. You cannot call every final grain newly grown. A repeat with fewer starting grains can make the change easier to track.
Keep a complete observation record
Finish with drawings or photos from all three stages. Keep the objective, lighting method, salt label, water source, and check times with the images. The phone photography guide can help you record the final dry slide.
Your result is a documented change from visible grains through a water preparation to a dry solid. Compare several regions before choosing an example photo. Remove the slides after use, follow classroom glass-cleaning instructions, and wash your hands.
Sources
- Institute of Physics: Crystals Dissolving in Water
- Thames & Kosmos: Biology TK2 Scope Experiment Manual, Growing Microcrystals
- Pacific Northwest National Laboratory: Investigating Dissolution and Precipitation Phenomena with a Smartphone Microscope
- Penn State Center for Nanoscale Science: Growing Crystals
Explore Wevision microscopes
Find the right microscope for your next observation
Visit the Wevision web store to explore current microscope models for learning, laboratories, classrooms, and hands-on discovery.
Visit the Wevision web store