
Beginner yeast observation guide
Baker's yeast under a microscope: see cells and look for buds
A packet of baker's yeast contains cells you can observe with a compound microscope. A thin wet mount makes their outlines easier to separate and inspect.
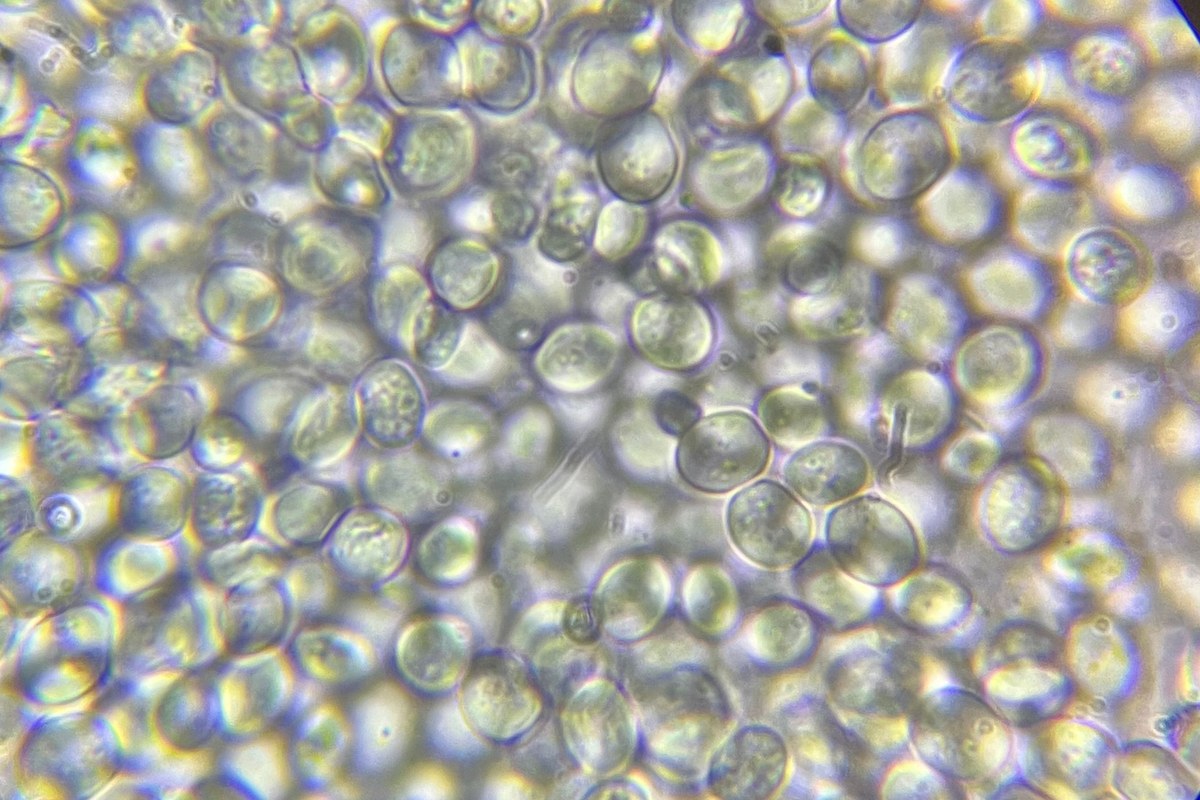
Set a useful observation goal
The goal is to prepare one readable slide, find separate yeast cells, and draw or photograph a few examples. Looking for buds is a second goal. Seeing budding is possible, but it is not guaranteed during a short session.
Baker's yeast, usually Saccharomyces cerevisiae, is a single-celled fungus used in bread making. In budding, a smaller cell grows from a parent cell and eventually separates. A packet of dry yeast is a convenient starting material for an indoor classroom or home activity.
Keep your question small: can you find individual cell outlines, and does any cell have a smaller attached projection? A useful record can answer that question without showing every internal structure or capturing an entire division.
Gather a small, known sample
Use active dry baking yeast from a labeled food package. Baking powder is a different product and will not provide the same specimen.
Gather a compound microscope with light passing upward through the slide, clean slides and coverslips, a dropper, a small clean cup, water, sugar, a timer, and paper for notes. A small balance and a measuring cylinder are useful for the measured preparation below. Children need adult supervision with glass and warm water.
Keep microscope materials separate from food preparation. Do not eat the mixture after handling it with slide tools. Use the package's water-temperature guidance rather than boiling water, and keep the experiment to the observation session. This activity does not require collecting unknown microbes or keeping a culture for later growth.
Prepare the yeast suspension
The University of Pennsylvania teaching activity combines 25 milliliters of warm water, 1 gram of sugar, and 1 gram of yeast. It records an initial observation after five minutes and then examines a covered drop. Use that as a repeatable starting preparation:
- Measure the water into the clean cup and dissolve the sugar.
- Add the measured baking yeast and stir gently.
- Write down the yeast product, amounts, water temperature if measured, and starting time.
- After five minutes, note the mixture's appearance and take a small sample for a first slide.
A balance is not essential for a first look. Saint Joseph's University's teaching activity uses a pinch of active dry yeast in warm water and allows time for it to become cloudy. If you use approximate amounts, label them as approximate. Do not compare that preparation with a measured one as though they were identical.
Hydration and the yeast's condition affect the result. A five-minute sample may show cells without clear buds. If time allows, examine a fresh drop later in the same session and record the elapsed time. Foam in the cup is not, by itself, evidence that you have seen a cell divide.
Make a thin wet mount
A wet mount holds the sample in liquid between a slide and a coverslip. The slide preparation guide explains this setup and how it differs from a dry mount.
Gently mix the suspension before sampling. Put one small drop on a clean slide. Hold the coverslip at its edges, touch one edge to the drop, and lower it slowly at an angle. Do not press down on the glass. Keep the underside of the slide dry and remove liquid that has spilled outside the coverslip.
If the view is packed with overlapping cells, prepare a separate diluted sample by mixing one drop of suspension with several drops of clean water. Record the dilution, then make a fresh mount. Use enough dilution to separate outlines rather than trying to force a crowded layer into focus.
Find cells before increasing power
Start with the lowest-power objective and follow the microscope's focusing instructions. Find the covered drop, then look for a region with scattered particles rather than a dense clump.
With a 10X eyepiece, a practical sequence is:
| Objective | Total magnification | Goal |
|---|---|---|
| 4X | 40X | Locate the sample area |
| 10X | 100X | Find a thinner region and center it |
| 40X dry | 400X | Inspect individual outlines and possible buds |
The Saint Joseph's activity uses about 400X for yeast observation. That is a starting point, not a promise of a particular image. The magnification guide explains the eyepiece-times-objective calculation.
Re-center before changing objectives. Check clearance from the side, use fine focus at 40X, and never let an objective touch the slide or force a focus control. Oil immersion is unnecessary for this first activity.
Adjust the lamp for comfortable brightness. If the microscope has an iris diaphragm, adjust it gradually for clearer outlines. Avoid closing it so far that detail becomes blurred or strong artificial edges appear. Nikon explains why increasing magnification beyond the optical system's useful range cannot create new resolved detail.
Look for evidence of budding
Look for repeated round or oval outlines. Slowly move through nearby focal levels to distinguish separate objects from overlapping ones. Some cells may appear alone, while others touch or form clusters.
A possible bud is a smaller rounded projection attached to a larger cell. Inspect the connection carefully. Two unrelated cells can overlap and resemble a budding pair. If you cannot distinguish the connection, label it as a possible bud rather than a confirmed example.
OpenStax describes budding as a process in which a projection grows and later detaches. A single still image cannot demonstrate that complete sequence. Record the visible shape without claiming that the photo proves growth over time.
Do not label every dark dot as a nucleus. Internal features depend on preparation, contrast, and focus. This unstained activity also does not establish how many cells are alive or confirm the identity of an unknown sample. The labeled baking-yeast package supplies the specimen's context.
Fix the preparation before adding power
| What you notice | Next step |
|---|---|
| Overlapping outlines fill the field | Dilute a separate sample and remake the mount |
| Large clear circles dominate | Look for trapped air and lower a new coverslip more slowly |
| Only a bright, empty field appears | Return to low power and locate the covered drop again |
| The whole field drifts | Let liquid movement settle before recording |
| Cells are visible but no buds are clear | Inspect another thin region and record that result honestly |
Change one thing at a time. A fresh slide can be more useful than repeated adjustments to an overcrowded or drying preparation.
Finish with a record you can repeat
Sketch three to five separate cells from one clear area. Add the sample recipe, elapsed time, dilution if used, eyepiece and objective powers, and whether the mount was unstained. Mark any uncertain bud with a question mark.
For a photograph, keep the original file and note any crop. The phone photography guide covers alignment and steady capture. Do not assign a cell size in micrometers without calibrating the imaging setup.
Remove the slide, follow classroom disposal instructions, clean the work area, and wash your hands. Keep broken glass in the designated sharps container. A successful session ends with a readable preparation and an honest observation, whether or not a clear bud appeared.
Sources
Explore Wevision microscopes
Find the right microscope for your next observation
Visit the Wevision web store to explore current microscope models for learning, laboratories, classrooms, and hands-on discovery.
Visit the Wevision web store