
Leaf observation guide
How to see leaf stomata with a clear-polish impression
A clear impression can transfer the texture of a leaf surface to a slide, giving beginners a practical way to look for stomata without cutting a thin section.
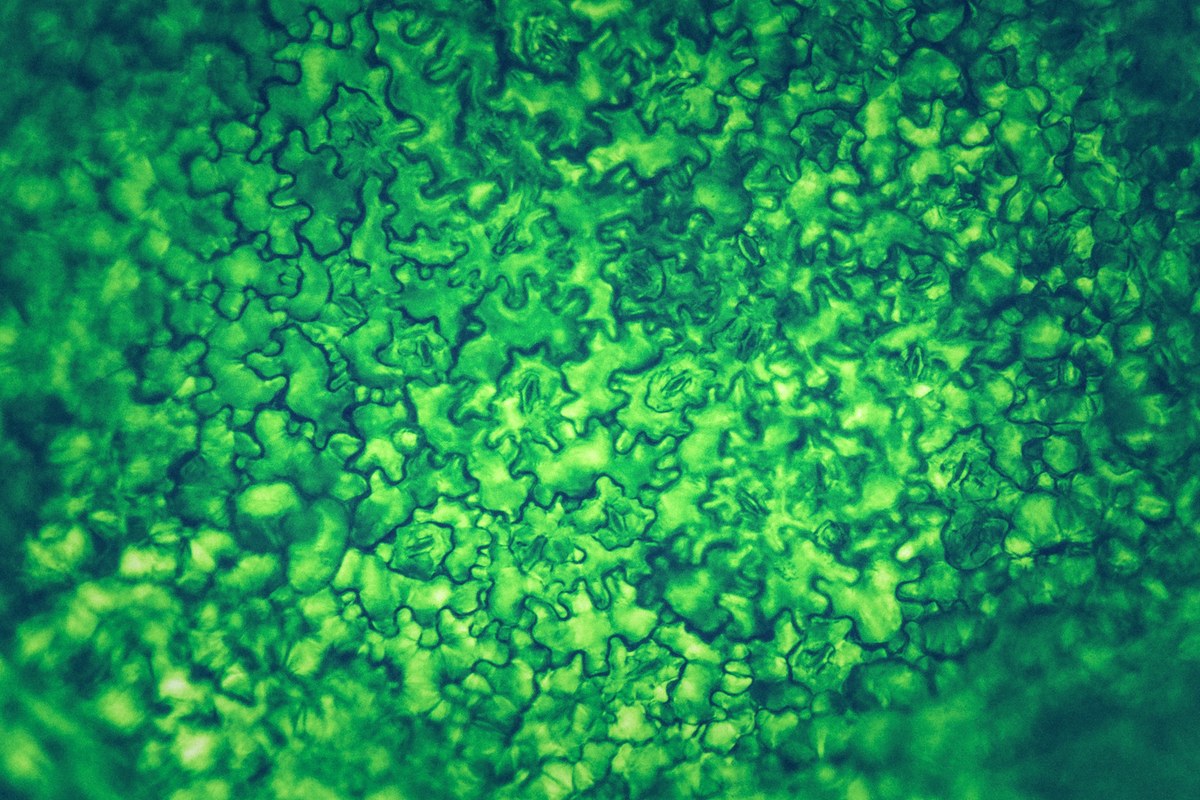
Start with a result you can record
The goal of this activity is a labeled drawing or photograph of a leaf-surface impression, plus a short note about what you could identify. A successful attempt does not require every field to show a pore. It gives you a repeatable method for making a cast, scanning it, and deciding whether a small oval feature is likely to be a stoma.
Stomata are tiny openings in a leaf surface associated with paired guard cells. They help regulate gas exchange and water loss. A clear-polish cast records surface texture rather than a living cross-section of the leaf. It can show the outlines of cells and stomatal complexes, but it does not reveal the internal structures that a prepared section might show. The green guide image shows actual leaf epidermis under a microscope; an uncolored cast may look paler and less detailed.
The onion-cell slide guide is a useful first exercise if you have not yet prepared a slide or focused a compound microscope.
Gather a small, controlled setup
Use a healthy leaf from a known plant that you are allowed to sample. You will also need clear nail polish, transparent tape, a clean microscope slide, a pencil for labeling, and a compound microscope with transmitted light. A teacher or adult should supervise children using polish, glass, and the microscope.
Work where the polish's fumes can disperse, away from flames, food, and eyes. Follow the product's label. Apply polish to the leaf only, not to skin or the microscope. If polish is unsuitable for your setting, use a prepared stomata slide or a teacher-made cast instead of improvising another chemical.
Choose a flat, dry patch on the lower leaf surface that fits under a piece of tape. Avoid the thick central vein, torn edges, and visibly dirty areas. Record the plant name if known, the date, and which side of the leaf you sampled. Different plants and different parts of a leaf can give different results, so these details matter.
Make the leaf-surface impression
UC San Diego's leaf microscope activity uses a thin, even coat of clear polish, lets it dry, then lifts the impression with transparent tape. Make one cast first before trying to compare several leaves.
- Put the leaf on a clean work surface with the chosen patch facing up.
- Brush a thin, even patch of clear polish onto the leaf. Keep the patch smaller than the tape and away from the vein.
- Wait until the coat is fully dry according to the polish instructions. Touch only an edge to check; a tacky cast will smear.
- Press a piece of clear tape smoothly over the dry patch, leaving a free tab to hold.
- Lift the tape slowly from one edge. The dried film should come away with it. If it stays on the leaf, do not scrape with a sharp tool; try a fresh, thinner patch.
- Place the tape, film side down, on a clean slide. Smooth it gently from one edge to reduce trapped air, without stretching the film.
- Label the slide with the plant and leaf side. Keep polish and adhesive off the microscope stage and objective lenses.
The material on the slide is the impression, not the leaf itself. The Smithsonian's plant-education demonstration makes that distinction when explaining this method. If the film tears, a small intact area can still be useful; mark which part of the cast you examined.
Find the pattern before increasing power
Start with the lowest-power objective. Place the slide securely, find the edge of the tape, then move into the clear cast. Focus through the eyepiece and adjust illumination until faint outlines become visible. Transparent material can wash out under excessive light.
With a 10X eyepiece and 4X objective, the total is 40X, which is helpful for locating the cast. Move to a 10X objective for a closer search, then to 40X only after centering a promising feature and checking that the objective has safe clearance. Re-center before each change and use fine focus at higher power. Never force a focus control or let an objective touch the slide. The magnification guide explains why a higher number does not automatically reveal more detail.
Scan in adjacent rows instead of hunting for one attractive spot. Look for repeated cell outlines and small structures with a central slit or opening between two curved guard-cell impressions. A bubble may look like a smooth circle with a strong dark rim; tape wrinkles and trapped dust can also resemble structures. Compare a suspect feature with others in nearby fields before labeling it.
Make a comparison another reader can repeat
Sketch or photograph one clear field. Mark a few possible stomata and surrounding cell outlines, and add the eyepiece and objective powers. Record the plant, leaf side, preparation method, and any uncertainty. If you take a phone image, retain the original and note any crop; the phone microscope photography guide covers camera alignment.
For a simple comparison, make a second cast from the upper side of the same leaf. Use the same patch size, objective, lighting, and scan pattern. Count possible stomata in several complete fields on each slide and record each field separately. A count per field is a comparison under your setup, not a stomatal density per square millimeter unless the field area has been calibrated. Do not assume the lower side always has more; plant species and leaf conditions vary.
| Record | Example of a useful note |
|---|---|
| Sample | Known plant, lower leaf surface, near the edge |
| Preparation | Clear-polish cast lifted with tape |
| Viewing | 10X eyepiece, 10X objective, transmitted light |
| Observation | Three possible stomata in this field; one tape wrinkle |
| Uncertainty | The cast is faint near a thick vein |
Fix a weak cast, then finish cleanly
If the view is blank, confirm that the film transferred to the tape and that you are focusing on the cast rather than the glass edge. If everything looks striped, remake the patch with a smoother coat and apply the tape without folds. If features vanish at higher power, return to low power and re-center. If a leaf surface resists the polish, try a different permitted leaf or use a prepared slide.
The useful result is an observation record that says what the cast showed and how you found it, not a claim that every oval shape is definitely a stoma. Remove the slide, follow classroom rules for disposing of the tape and polish-coated leaf, close the polish container, and wash hands. Keep the microscope covered after use. A second reader should be able to repeat your preparation and understand the limits of your conclusion.
Sources
Explore Wevision microscopes
Find the right microscope for your next observation
Visit the Wevision web store to explore current microscope models for learning, laboratories, classrooms, and hands-on discovery.
Visit the Wevision web store