
Back-to-school microscopy guide
Onion cells under a microscope: your first plant-cell slide
A thin onion peel can turn a first microscope session into a clear view of plant cells, provided the specimen is flat and you begin at low power.
Make the first session achievable
For a September classroom or home-learning session, onion cells offer a manageable starting point. The material is familiar, the preparation is small, and the first useful result is a pattern of neighboring cells rather than a fast-moving organism.
Set three goals: prepare one flat specimen, find a clear group of cells, and record what is visible. Save detailed measurements and extra treatments for a later session. A student who can explain how they found the image has learned something useful even if every structure in a textbook diagram is not visible.
If you are still choosing equipment, the student microscope guide explains how controls, viewing comfort, and supplies affect a beginner's experience.
Choose the thin inner peel
An onion bulb contains fleshy layers that are modified leaves. For this activity, use the nearly transparent epidermis from the inner, concave surface of a fresh layer. The dry brown wrapping and a thick chunk of onion flesh are different specimens and will not give the same view.
Science & Plants for Schools uses onion epidermis mounted in water for an unstained cell-measurement activity. The thin peel allows light to pass through and makes neighboring cell boundaries easier to follow.
Gather a compound microscope with transmitted illumination, a clean slide and cover slip, water, a dropper, forceps, tissue for spills, and an onion layer prepared by an adult or teacher. Keep food preparation separate from the microscope workspace. Children need supervision when handling glass and tools.
Prepare a flat wet mount
Work with a small peel that fits comfortably under the cover slip. A larger piece is harder to flatten and often folds over itself.
- Place a small drop of water near the center of the slide.
- Use forceps to lift a thin, translucent peel from the inside of the onion layer.
- Transfer the peel into the drop and gently unfold it. Remove thick flesh attached to it, or start again with a thinner piece.
- Hold a cover slip by its edges. Touch one edge to the water and lower it gradually to reduce trapped air.
- Check that the cover slip rests normally. Do not press it down to crush a thick specimen.
- Wick away liquid outside the cover slip with tissue, leaving the specimen wet and the underside of the slide dry.
If folds dominate the mount, remake it before increasing magnification. Slide preparation is part of microscopy, and a second, thinner peel can be more helpful than repeated focus adjustments.
Find cells before increasing power
Begin with the lowest-power objective and follow the microscope's focusing instructions. Center the peel over the light opening, find its edge or a recognizable cell boundary, and move into a flat region.
With a 10X eyepiece, the following sequence is a useful starting point:
| Objective | Total magnification | Observation goal |
|---|---|---|
| 4X | 40X | Locate the peel and survey the cell pattern |
| 10X | 100X | Follow several complete neighboring cells |
| 40X | 400X | Inspect a selected cell or possible nucleus |
Re-center the feature before changing objectives. Use fine focus at higher power and check clearance from the side. Never force a focus control or let an objective touch the slide. If the image disappears, return to low power.
Adjust illumination for comfortable contrast. Very bright light can make a transparent specimen difficult to interpret. Higher magnification does not guarantee additional resolved detail, as Nikon's useful-magnification guidance explains. The magnification guide covers the calculation and focusing sequence in more detail. Oil immersion is unnecessary for this activity.
Recognize what the image supports
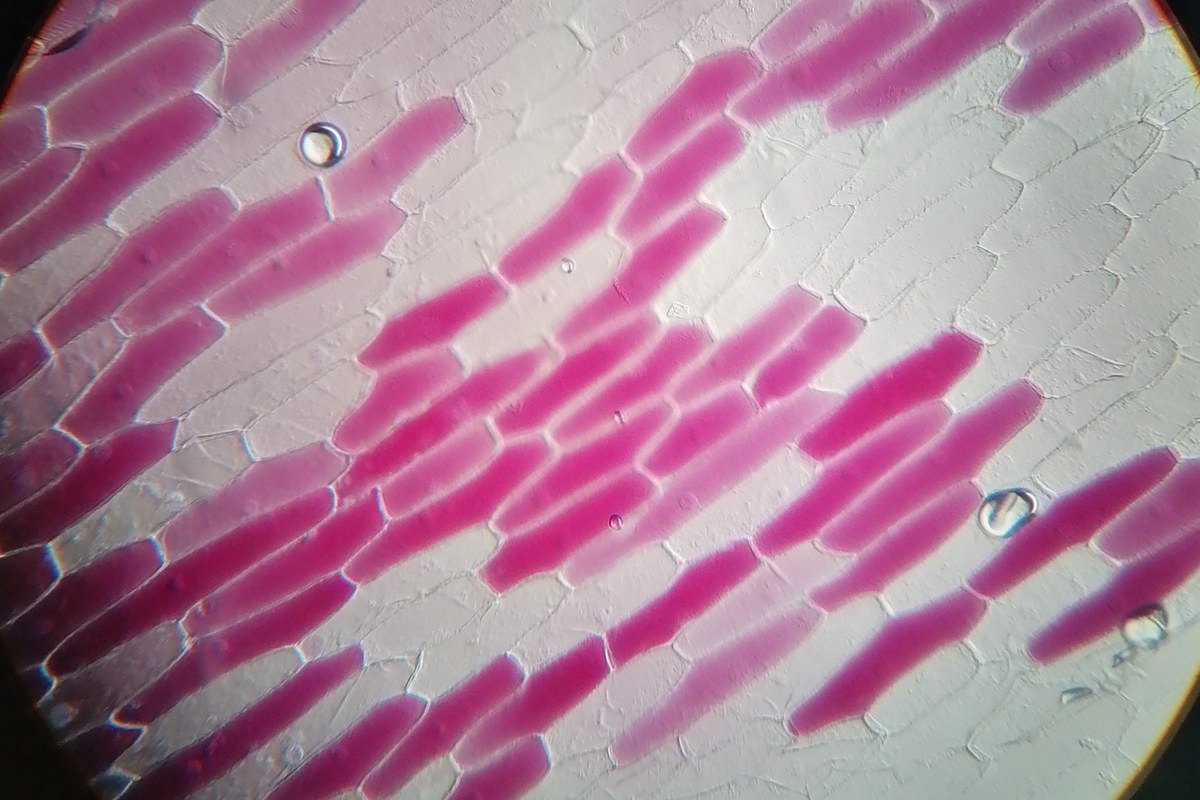
Start with the repeating boundaries. Onion epidermal cells often appear elongated and roughly rectangular, although their outlines and sizes vary. The clear cell walls make a good first feature to sketch.
The nucleus may appear as a rounded or oval body within a cell, sometimes near an edge. Its visibility depends on focus, preparation, and contrast. Ohio State's microscopy collection shows onion nuclei with iodine staining to increase contrast. An unstained wet mount may show less internal detail.
Much of a mature cell's interior is occupied by a large vacuole. In a simple view, a clear central area can be consistent with that structure, but it does not mean every membrane boundary is resolved. Avoid labeling the visible cell wall as the cell membrane.
RIT's virtual-microscope description emphasizes that these bulb epidermal cells lack chloroplasts. The bulb stores resources rather than functioning as a green photosynthetic leaf. Missing green chloroplasts therefore does not mean the microscope failed.
Use staining as a separate comparison
First try the water mount. If the lesson requires clearer nuclei, use a teacher-prepared stained slide or follow the school's approved staining protocol and the reagent's safety instructions. A classroom iodine reagent is not interchangeable with an arbitrary household iodine product.
Label any treated slide so another reader knows that its color was changed during preparation. Compare it with an unstained mount at the same objective setting. Ask which features became easier to distinguish, rather than assuming that more color always means a better preparation.
Staining is optional for the initial goal of locating and drawing cell boundaries. It should support a defined observation, not become a barrier to completing the first session.
Fix common first-slide problems
| What you see | Likely explanation | Next step |
|---|---|---|
| Dark layers with overlapping outlines | Folded or thick tissue | Remake a smaller, flatter peel |
| Smooth circles with strong rims | Trapped air bubbles | Compare with the surrounding cell pattern and remake if needed |
| Clear walls but little internal detail | Limited contrast or a different focal level | Refine fine focus; compare with a prepared stained slide |
| The image vanishes at higher power | The feature was off-center | Return to low power and re-center |
| Cells shift as the slide dries | Evaporation or moving liquid | End the observation and prepare a fresh mount |
Change one thing at a time. Record the adjustment that helped so the next session starts with a better method.
Leave with a useful observation record
Draw a few adjacent cells from one clear area. Label structures you can distinguish and mark uncertain features as uncertain. Add the onion layer used, whether the mount was stained, and the objective and eyepiece powers.
For a photograph, keep the original image and note any crop. The phone microscopy guide explains camera alignment and steady capture. Do not turn a phone image into a micrometer measurement without calibrating that imaging setup.
Afterward, remove the slide, dispose of the preparation under classroom instructions, place broken glass in the designated container, clean spills, and wash hands. A successful first onion slide gives the learner a repeatable sequence: choose thin tissue, mount it flat, focus from low power, and describe the evidence carefully.
Sources
- Science & Plants for Schools: Teaching Microscopy Using Plants
- Science & Plants for Schools: Calibrating and Measuring (School Science Review, July 2025)
- Rochester Institute of Technology: Virtual Microscope, Onion Epidermis
- Ohio State University at Lima: Cell Organelles Microscopy
- Nikon MicroscopyU: Useful Magnification Range
Explore Wevision microscopes
Find the right microscope for your next observation
Visit the Wevision web store to explore current microscope models for learning, laboratories, classrooms, and hands-on discovery.
Visit the Wevision web store