
Sand microscopy guide
Sand under a microscope: a realistic viewing guide
A real sand sample may look less like a tray of gemstones than a viral photograph, but its grains still record useful clues about rocks, water, wind, and living organisms.
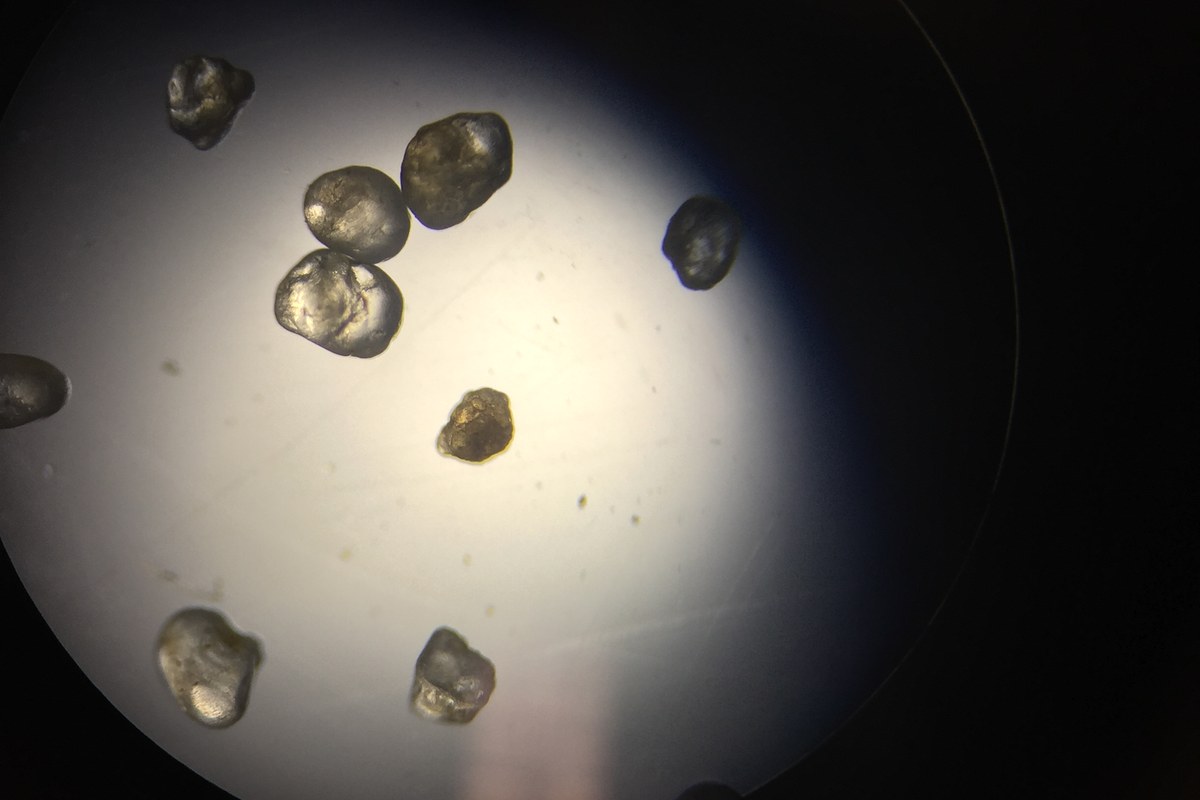
Begin with what sand really is
Sand is a size category, not one material. On the Wentworth scale used in geology, sand grains range from 0.0625 to 2 millimeters across. A sample can contain weathered pieces of rock and mineral, fragments produced by living organisms, or a mixture of both.
That helps explain why sand under a microscope does not have one universal appearance. Continental sand may include clear or cloudy grains that resemble quartz, dark rock fragments, mica-like flakes, or grains with several colors. Tropical coastal sand can contain pieces of shells, coral, calcareous algae, sea urchin skeletons, or foraminifera. A playground, riverbank, volcanic beach, and coral beach should not be expected to look alike.
Popular online images sometimes arrange the most unusual grains from a much larger sample. The result may be real material found in sand but not a representative field from one random pinch. To make an honest comparison, observe several areas and record ordinary grains as well as the striking ones.
Use low power and reflected light
A stereo or dissecting microscope is usually the easiest instrument for loose sand. It provides a wide field, reflected light from above, and enough working distance to view and move opaque grains in a shallow dish. The University of Hawai‘i sand activity starts with the lowest power and a thin layer of grains in a clean, dry Petri dish.
A compound microscope can be useful when it has a low-power objective and a safe way to illuminate the sample from above. Start with the 4X objective, which commonly gives 40X total magnification with a 10X eyepiece. Higher power is rarely helpful for the first survey because it narrows the field and reduces working distance.
Sand is thick and mostly opaque, so transmitted light from below may produce silhouettes or uneven views. Do not move to a 10X or 40X objective unless the grain is securely centered, the objective has safe clearance, and the lighting still reveals useful detail. Oil immersion is not appropriate for loose sand.
The microscope magnification guide explains why 400X or 1,000X is not automatically better. For millimeter-scale grains, lighting, field width, working distance, and depth of focus usually matter more than a large magnification number.
Collect a small sample responsibly
First confirm that collecting is allowed. Rules vary by beach, park, reserve, school, and private property. The National Park Service, for example, prohibits taking sand or other natural objects from White Sands National Park. When the rule is unclear, leave the material in place and use sand obtained legally from another source.
Avoid roadsides, active construction areas, industrial sites, storm drains, and any location where the material could contain sharp debris or unknown contamination. Children should collect and handle samples with adult or teacher supervision.
For an allowed location:
- Take only a small spoonful from a safe, accessible surface.
- Place it in a sealed, labeled container.
- Record the location, date, and setting, such as beach, riverbank, garden, or sandbox.
- Let damp sand dry in a covered container before viewing it as a dry sample.
- Keep samples from different locations separate.
Location notes are part of the observation. A grain's appearance has more meaning when you know where the sample came from.
Prepare a controlled viewing area
Use a clean, dry Petri dish, watch glass, or other shallow sample holder that fits safely beneath the lowest-power objective. Do not pour loose grains directly onto the microscope stage.
Place only a small pinch in the holder and spread the grains into a single, sparse layer with a toothpick or probe. Crowded grains hide one another and make focusing harder. A dark background can improve contrast for pale grains, while a white background can make dark grains easier to see.
Before looking through the eyepiece, view the setup from the side. Confirm that the objective is well above the tallest grain and that the sample holder cannot tip. Bring the lowest-power objective into focus gradually. Never force a focus control or allow the objective to touch the sand or holder.
Scan and record instead of cherry-picking
Move through the sample in a simple pattern so the result represents more than one attractive cluster. For each field, record a few observable features:
| Feature | What to record | What it may support |
|---|---|---|
| Color | clear, white, tan, red, green, gray, or black | a comparison among samples, not a mineral identification by itself |
| Light response | transparent, translucent, opaque, shiny, or dull | a description of surface and optical appearance |
| Shape | very angular, angular, subrounded, rounded, or well rounded | a cautious comparison of wear and transport history |
| Texture | smooth, pitted, layered, crystalline-looking, or irregular | a clue for closer study |
| Repeated structure | pores, chambers, ridges, or growth patterns | a possible biological fragment that needs reference material or expert confirmation |
Appearance alone usually cannot confirm a mineral, rock type, organism, or place of origin. Clear grains may be consistent with quartz, for example, but glass and other minerals can also look clear. A shell-like fragment may be biological, yet abrasion can remove the features needed to identify it. Use terms such as possible, resembles, and consistent with when the evidence is visual only.
Compare samples under the same magnification, lighting, background, and camera settings. Count or describe grains from several fields before drawing a conclusion. This turns a colorful observation into a repeatable activity.
Photograph the sample with context
Focus the microscope clearly by eye before attaching a phone. Align the active camera lens with the eyepiece, stabilize the phone, and avoid heavy digital zoom. The phone microscope photography guide covers alignment, exposure, vibration, and common image problems.
Record the sample label, microscope type, objective, eyepiece, lighting direction, and whether the image shows a random field or selected grains. If size matters, include a calibrated scale rather than estimating dimensions from a phone picture. Honest captions prevent a selected group of unusual grains from being mistaken for the typical appearance of all sand.
Protect the microscope during cleanup
Return loose grains to their labeled container by lifting out the sample holder before cleaning around the stage. Do not brush sand toward an objective, rack, or focus mechanism. If grit reaches an optical or moving part, follow the microscope manufacturer's cleaning instructions instead of rubbing it across the surface.
Close the sample container, wipe the work surface, and wash hands after handling material from outdoors. Do not return a laboratory sample to the collection site, because it may have mixed with other samples or indoor debris.
Treat every sample as its own story
Viewing sand at low power can connect an ordinary material to geology, coastal processes, and biological structures. The most useful result is not a gemstone-like photograph. It is a documented comparison that shows what was common, what was unusual, and which conclusions still need better evidence.
Choose the microscope and illumination for the specimen rather than chasing maximum power. The compound microscope buyer's guide explains how illumination, working distance, stage design, and sample type shape that choice.
Sources
Explore Wevision microscopes
Find the right microscope for your next observation
Visit the Wevision web store to explore current microscope models for learning, laboratories, classrooms, and hands-on discovery.
Visit the Wevision web store